Getting started / The Basics
Welcome to the PresetNinja docs.
Last updated
Welcome to the PresetNinja docs.
Last updated
After you've installed the Chrome extension and logged in with your website credentials, that's all you need to get started trying to find images from your favorite photographers that contain the proper metadata needed to generate a preset based on their edits. I've made it very simple to check if a particular image has what you need -- you need to hover your mouse over the image, and the thumbs up or thumbs down will tell you everything you need to know.
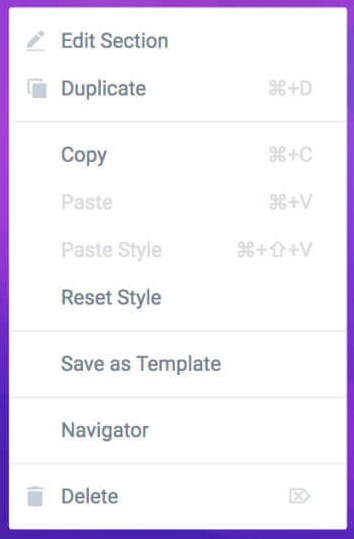
Once you've found a valid image that you want to use for a preset, simply right click the image and select "Download preset" and the .xmp file will be saved to your default downloads folder.
The next step is to import it into Adobe Lightroom(see: Importing a preset). I've found that 99% of the time, if the metadata is there, the photo was edited in Lightroom (most likely Lightroom classic), so it's recommended to use Lightroom for this process. A lot of times these can also be imported into Camera Raw, but it doesn't work as seamlessly, so I just advise to use Lightroom.
When you first log in and open PresetNinja in your browser, all of the tools/settings will be enabled. Each one has a little info tool-tip you can hover over for a brief explanation, but I'll give a bit more info about each one here.
Many, if not all of the big portfolio hosting websites have a setting that can be enabled that will prevent anyone browsing that website from being able to right-click to do anything within the right-click context menu (the main purpose of this is to prevent anyone from saving images directly). What this setting will do is attempt to bypass this restriction whenever possible, to allow you to use your right-click functionality as normal.
It should also be noted that occasionally you might use a website that uses a custom right-click menu for their tools (ex. Elementor), and this still will almost always cause issues with that. I have a solution for this coming in the near future (enabling this on a per-website basis), but in the mean time there are a couple of workarounds. The easiest is to just keep this setting disabled until you encounter a problematic website, and then enable it as needed. Alternatively, there are a number of very robust (and free) Chrome extensions that also bypass the right-click restrictions, but allow you to enable it on a per-website basis as you encounter them. I recommend Supreme Copy.
When you export a preset, 99% of the time it will contain some metadata that will not be helpful to anyone other than the photographer that took the photo, because it is specific to that photographer's camera/lens, as well as the lighting conditions of that specific photo. This gets annoying every time you try to apply the preset and it adjusts your exposure, white balance, and lens corrections, etc to values that do not work for your photo. This setting will strip away the unnecessary things before the preset makes it to your computer.
Another tactic that some websites will use to prevent you from downloading images is to add hidden elements on top of images that are invisible to you but prevent your browser from understanding that you're trying to right an image, because it's covered with layers of "invisible" nonsense. This setting will attempt to bring those images to the front of all those layers, so that it's sitting on top and can be right clicked like normal. This does not always work and very often breaks other websites when you don't want it to, so I recommend keeping this off until you need it.
One case you might encounter is a photographer that seems to have stripped the metadata from seemingly every single photo that you're able to find in any of the pages. Good news for you, in this case, is that often times there are pages that are no longer accessible through any public facing page or menu, but still exist if you have the URL. They've essentially removed the ability to find the page by deleting any link or reference to it, but never deleted the actual page. If this is the case, 90% of the time you can still find a lot of these pages by searching Google to see what pages are still "remembered" from when these pages were public. Eventually Google will crawl websites again and take notice of pages that were once public and now are not, and those will be removed from these results, so keep that in mind. This does have time limitations.
It may be the case that you want to check existing images you have on your hard drive (images you've taken yourself, images you've previously saved from elsewhere, etc) -- this tool will allow you to do that. Being a Chrome extension, to be able to check any images for metadata, the images have to be loaded into your browser somehow. This is just a simple way to get the images you want to check loaded into your browser without uploading them to a third party website.
As noted above the tool, these images are not uploaded anywhere when you load them into the file checker (for the curious nerds like myself, this i done by converting the images into base64) -- all functions are performed locally.
There might be times where the website you're looking at will put a lot of effort into preventing people from saving images through normal means. This button will remove all the code that allows them to stack the images and elements in such a way that prevents you from checking for the preset data and/or downloading that preset.


